Friday, July 12, 2019

The Ties That Bind

Pile-O-Binding
That's right, let's talk about binding.....


After the quilt top has been pieced and completed...
After the backing has been prepared...
After the "sandwich" has been made.... (hold the mayo)
After the quilting has been done (by you or someone else)....
The next-to-the-last step is the binding.

(The very last step is the label.  That is a subject for another time.)


WHAT is the binding?  That nice, finished edge.


Miss Mary, one of my quilting buddies, called me today.  She is fairly new to quilting.  She was asking me about binding....how wide to cut the strips, how do you know how much fabric you need, etc.  So here we go.

Binding Methods:  Determine what kind of binding you want.

There are two camps on binding:  Method one, the RIGHT way and Method two, the FAST way.

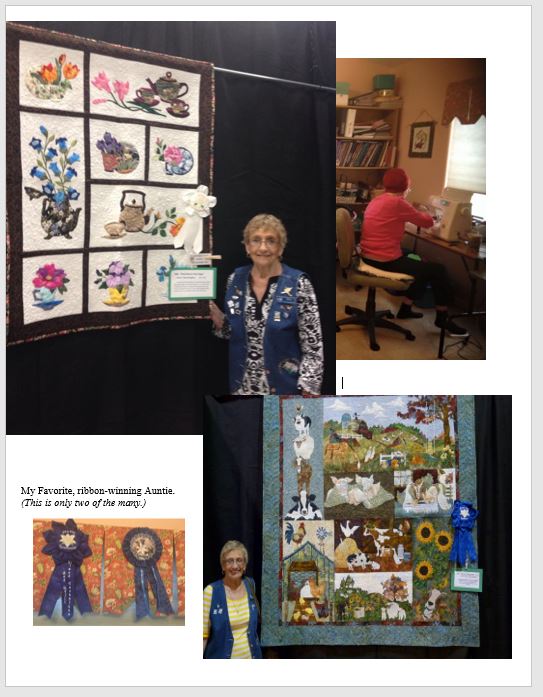
Method 1: Attaching the binding completely by hand.  This is the quilter-purist-preferred method.  My quilting-buddy, Auntie would turn over in her grave if she knew I did not attach all my bindings using this method.

Prepare your binding.  Sew the binding to the front side of the quilt, flip to the back and hand stitch the back side down (sitting in front of the TV  with a glass of wine watching some Hallmark movie...because everyone always lives happily every after.)  Watch this good video by  Melanie Kahm.

I use this method for most bed quilts.  I must admit, it is prettier and there is just something more loving about hand stitching your binding. Think of the bragging rights!  "I slaved over a hot needle for 6 hours attaching that binding!"

Method 2:  The Flange Method.  Here is one of the best tutorials I've seen using this method from Quilt Social.com.
The quilt in the picture above is bound using this method.  See the tiny green flange?  This method is fast and I like the look.  I use this method for baby quilts and wall hangings.

But for every positive there is a negative.  For me the negative is you can see the stitching on the back side.  Also, you need to be very careful about your stitching on the front of the quilt, keeping it even and as close to the ditch  as you can.

How Much Fabric: To determine how much fabric you need for the binding (or for the borders, or for the backing)  I love  the website Quilters Paradise to calculate my borders, my backing and my binding.

There are a number of calculators on this site that I find really easy to use, even from my cell phone because don't-you-know I will have forgotten to take my measurements and write it all down BEFORE I went to the Quilt Shop. Just plug in the numbers and away you go.


Binding tools:  As a quilter you have most likely already discovered you can spend a TON of money on lots of  rulers, markers and other gadgets.  One that I purchased at a quilt show but could NEVER get to work for me was the Binding Tool Ruler.


I watched video after video on YouTube, but I just don't get it.  If it helps you and if you can get it to work for you (and it does for many) then I say go for it.  I don't feel to bad though, Jenny Doan has a couple tutorials on YouTube for some pretty awesome quilts using this ruler:  Geese in Motion Quilt and the Binding Tool Star Quilt.


Sunday, June 23, 2019

Getting Started Series: What Now?

It's been a rather crooked journey down this "Getting Started" road ... hopefully somewhat informative.
Some of the basics have been reinforced for me, that much I can say.


Where have we been?
We learned about the proper use and technique of a Rotary Cutter
All about Fabrics.
Whether we want to Stash or not Stash.
Not all Thread is created equal.
And finally the most important of all, that 1/4" seam.

We haven't yet discussed other "stuff" you'll need.... I have blogged about STUFF in the past; 

"So, now what?  We have a bunch of random bits of information, how do I actually MAKE a quilt?"

You have to start by picking a pattern.  The very, VERY first quilt I made was a simple four-patch lap quilt for my son.  I honestly can't remember where the idea came from or why I even had the chili pepper fabrics on hand, but I did....and he was impressed (me, too, truth be known.)


Over the years I've accumulated LOTS-O- patterns; both purchased and free, plucked off the internet or acquired here-and-there.  There is lots of inspiration "out there."
 
Pat Sloan, of course.  She has both for-purchase patterns and free patterns. 
Jenny Doan of Missouri Star Quilt Company has a ton of tutorial videos on YouTube.  Many are no- pattern-needed.  
And don't forget Pinterest.  Many of the links lead to free tutorials and patterns.

And, speaking of YouTube.... you could get lost in the world of quilting tutorial videos on YouTube.  Anything you would EVER want to know about quilting is there.  Get a coffee (or a wine...depending on the time of day) and have a look.

Instructables.  This is the most fun website.  You can learn ANYTHING from this site.  And, look what I found! Quilting 101.  EVERY SINGLE step for making a simple quilt!  Have a look. (Disclaimer, I don't necessarily agree with every technique, i.e. using sheets for backing.  But, it's a good place to start.)

If you can stand just one more, Art Gallery Fabrics' site is amazing!

Also, check out your local quilt shops.  Take classes.  The second and third quilts I ever made were the result of a Block-of-the-Month class I took at Cool Cottons in Portland, OR. 


Even though I was following the directions, exactly (or so I thought) I managed to put EVERY SINGLE corner on EVERY SINGLE block on backward.  I didn't even notice until someone in the group said "Oh, look, how interesting your corners are...."  There is a verse in the Bible that says "Even a fool looks smart if he/she keeps their mouth shut."  I didn't say a word.


There are aspects of this quilt I like even now, I try to over look the many mistakes.  My g-sons cuddle up with it all the time, still, even though their little feet stick out.


You've heard the saying "If I can do it, you can do it."
Ya just have to get started.


Wednesday, June 5, 2019

June Gloom


June weather in California is cloudy and gloomy....sometimes it burns off during the day, sometimes it does not.  Californians have a name for it "June Gloom."

That pretty much describes my mental climate of late.


We laid the quilting Auntie to rest and I spent some time with Unkie just touching her stuff in her quilting studio and reminiscing.  We cried and we laughed as we recalled fun times.


"...and it came to pass...". After June Gloom comes sunny July and then scorching August.  Happens every year.

Sprinkled throughout the Bible, both Old and New Testaments, is a phrase that sounds particularly good to me right now;
"...and it came to pass..."  Its true meaning is "...and then it happened..."  but I am claiming it as my own for now to mean
"...it did not come to stay, but it will pass..."


I'm sure you've heard the saying "fake it 'til you make it."  That's what I'm doing for now.  I am forcing myself to sit down at the sewing machine a bit most days and work on a baby quilt for a new mom and a fun wall hanging for friends who are planning a car trip (taking all their kids left-behind belongs and delivering them to their door steps.)  Both fun, cheery projects.


Last evening I spent time with my quilting neighbor, one of the Sew Sisters where I live, and went over a new pattern with her.

The quilting mojo will return.

Saturday, May 4, 2019

My Beautiful Quilting Auntie And Partner In Crime


Piled on top of the general busyness of life -- work, g-ma duties, travel for work, some quilting (not much) and still more work -- I have been dealing with my lovely, quilting-buddy Auntie as she prepares to leave this world and meet her maker...her creator, who knit her together Psalms 139:13.


It is a very tough time, as you can imagine.  I was at her bedside in Spokane last week and during her wakeful times we talked about family, God and Quilt Week in Paducah.
 

Over the years we traveled to Paducah for Quilt Week many times. I have family in Paducah; my mom and dad and my sister and B-I-L.  We ladies were a foursome. Although my mom and sister do not quilt, they were gracious and put up with us and our quilting addiction.

I said good-bye to my mom a little over two years ago.  Now it is time to say good-bye to my second mom.
With Auntie's eminent passing, I must say, I've lost a bit of my enthusiasm for quilting.  It's just not the same.

Mom and Aunt Nyla 2016
The wall hanging I made in Memory of my mom and in Honor of my Quilting Auntie.


Friday, March 22, 2019

Getting Started Series: Seams to Me


If, like me, you came to quilting with a history of sewing garments, moving from a 5/8 inch seam allowance down to a 1/4 inch seam allowance was a big thinking adjustment.  When my quilting Auntie told me to use a 1/4 inch seam, I actually argued with her. (When sewing garments now, that 5/8 seam allowance looks SOOOO big! AND, I think of all the fabric I'm wasting!)

So, how important is a 1/4 inch seam in quilting?   In my opinion this is the most important thing to master.   It makes ALL the difference! If you're sloppy about your 1/4 inch seam your points won't match, your seams will be crooked (especially at the end), the blocks won't line up and your whole quilt will be wonky.

Of course there are many helpful blog posts and YouTube videos about sewing the perfect 1/4 inch seam.  I've read six blogs just this morning and have even learned a few things.  Here are a couple that I think are the best:

Understanding the 1/4 seam, sewing a 1/4 seam and measuring for accuracy:  HERE

Test your 1/4 inch seam:  HERE

Bonus site: HERE  It is very short and to-thge-point post.

Good Video with helpful hints:  HERE

Tools that will help:  I do use a 1/4 foot on my sewing machine.  They are worth the investment, but they may not be accurate. Make some test blocks.


QTool sewing edge.  I have not used this product, but it looks promising.  I found this on Amazon.


Bonus tip:  I like Marci Baker's videos.  Check her out HERE

TTFN  Sew Happy!

Saturday, March 16, 2019

Inter-National Quilt Day

If you follow any of the Facebook quilting pages such as Quilt Along with Pat Sloan, Jen Kingwell, or Quiltville (to name just a few) you'll notice posts from around the world. 

In this day of unrest, there is one thing that can bind us together....Hug a quilter today.


I am dedicating this Quilt Day to my favorite quilting Auntie, Nyla Stoughton.   
(She has not been able to quilt for many months due to health issues.)


Friday, March 1, 2019

Her Name Shall Be Called "MaMoo"

How many sewing machines do you actually need?  The truth is, ONE...and maybe a backup when that ONE is at the spa for an R & R .  Well, and maybe another one for guest sewers...and don't forget the Featherweight.  Everyone needs a Featherweight. And maybe just one more....

...the one your friend found in a thrift shop on her trip to Tahoe, and  brings it back for you.

Her Name Shall Be Called MaMoo (pronounced "Ma - MOO")


Singer 201-2


MaMoo was my Great Grandmother's nick name.  Mary Elizabeth Graff was the very first quilter in my life.

I can remember as a little girl spending weekends at MaMoo's house.  Her friends would come over and they'd sit around a big quilting frame set up in the dining room and quilt and gossip.  I'd sit under the frame and just watch the needles moving in-and-out (and listen to all the gossip.)

All In The Family
Happy Birthday to Me!  (March is my birthday month.)

Yes, I do have five sewing machines!  It's like a sickness....
Miss Ellie is my traveling companion.
Millie and I spend the most time together.
The Twins are for guest sewers (we have a group that meets once a week.)
Now we have The G-Ma...pulling the family together.