Saturday, January 30, 2021

A Look Back

Long-long-ago ....  The Mezzanine Room was a Plain-Jane room with no decorations.  It was a meeting room that anyone who lived in the apartments could use...but no none did...it sat empty.*


One day I picked up the key to have friends over for a sew day. 
I spent a day dragging supplies from my apartment over to the Mezzanine room....
getting all my 10,000 steps that day.

September, 2016 Sew Day

We had so much fun...people came and went as they felt the need.  We sewed, we ate, we laughed.  Then when it was all over I cleaned up the room and took the key back to the office.

We repeated this sew-day-process several times until one day the manager said "You should keep the key.  No one uses that room but you."  And the Tuesday night group, the Needlers, was born.

The Studio has changed a bit over the years...

2017


2018


Until, finally, it is all ours.

We have supplies, decorations, books, fabric and quilting stuff in every corner and in every cupboard.

People passing by are amazed when they stick their head in the door and look around.  We even had one new tenant to the building, Robert, stop in one night to talk about Nancy Zieman.  Turns out his late wife was a quilter....we set his mind to remembering and gave him a smile.


December, 2020

Because of COVID and social distancing, we are not officially meeting at this time except those of us who live on property and happen to cross paths from time-to-time.  But, we are looking forward to the day when we've all had our shots and are certain we're not rabid and we can get a group together again.   I miss my sew sisters.

Miss Kate is snapping the picture

Miss Kate


Studio Sweet Studio


*The property has 8 buildings and each building has a Mezzanine Room.


Sunday, January 24, 2021

Freshen Up Your Look

Christmas has long been put away....anyone know how to decorate for January?  Think about it....October has Fall and Halloween; November has Thanksgiving; December has Christmas and February has Valentine's day.  There is nothing for January.  It is a chilly, boring month (where I live it never really gets COLD).  I suppose you could do something with
National Spaghetti Day or Learn-Your-Name-in-Morse-Code Day.  Click HERE for a full list of days to celebrate in January.

Instead, I decided to freshen up my living space.  As I continue to go through shelves and drawers of quilting and craft stuff,
I came across a piece of fabric that was originally intended for a skirt.  Well, that never happened.

So I decided to make sofa pillow covers, instead.


Before


After

I like 'em!  Cheery.


The cover is a simple, envelope style with no zipper.  I watched a YouTube video by Jann Newton.  It was fast.  It was easy. 
I used this same method to make pillow covers for Christmas.

These covers are so fast and easy, you could have a different set for every month of the year! 
April 24 is National Pigs-In-A-Blanket Day and I have just the fabric!


In case you are wondering....it is left over from a quilt I made my nephew, Wilbur, in December 2015.  He likes pigs.  
I'm Charlotte....he is Wilbur.....get it?

Happy Sewing!

Saturday, January 23, 2021

Tips Worth Mentioning

Have ya'll discovered YouTube?  Of course you have.  You can find anything and EVERYTHING on YouTube.

Are you sad?  YouTube will make you smile:  Learn to Knit 

Can't sleep?  YouTube can either entertain you watching one of your favorite actors like Katherine Hepburn, or put you to sleep with soothing music.

Keep up with your favorite shows!  e-Bird commentary on 90-Day Fiance.  You don't even have to watch the show....e-Bird will sum it all up for you!

Likewise FaceBook is a wealth of information!  (Hide all the political stuff, that'll just drive you to drink!)  Here are a few of my favorites from each platform.

Facebook:

Turning narrow fabric tubes using an empty Aurifil thread spool.  HERE   This would have been so handy constructing Passiflora this past Christmas.  Look at those skinny arms!

All about bobbins:  The good, the bad and the ugly.  This post is specifically regarding Featherweight bobbins, but I found it helpful. The bottom line seems to be "don't buy cheap."

Finishing the quilt binding!  It drives me crazy!  I always manage to get it twisted up and then I have to employ Jack-the-Ripper.  Karen of Just Get It Done quilts makes it look easy.

YouTube:

The older we get, the smaller the eye on that needle!  Thread the needle using a toothbrush!
Here
is an alternative method.  Either way, no spit on the thread!  ick....


I didn't even KNOW I was supposed to clean my scissors!


An interesting method to mark quilt rulers to make cutting fabric faster and more accurate using Incredible Tape By Marathon Threads.  I found a similar product on Amazon.


Good quilt block pressing method.  I've seen a tailor's clapper used, as well.


You're welcome and I leave you with the beautiful music of Miss Cynthia Lin.


Sunday, January 17, 2021

Inspiration Comes in Spurts

It is two weeks into a new year and all of a sudden I feel energized!  Maybe it is is because I have finished Storm At Sea
(it goes to the LAQ today.) Or, maybe because I'm getting used to being home ALONE, ALL THE TIME.  Who knows....

Lately I've been motivated to sew, but instead of sewing I am searching the internet for free quilt patterns
(like I don't have enough patterns!)  Even so, I thought I'd share some of my finds with you.

With an eye on what I already have and what to use up
A few years ago I was given a Jelly Roll as a gift.  Beautiful fabrics (nothing like the picture below.)
I was saving it for a special quilt.  But, as with so many other pieces of beautiful fabric, it was put in a cupboard and forgotten.

With the new year comes the annual cleaning-out-of-all-the-Studio cupboards. Lost treasures are found!


Yesterday I watched this video and LOVED her idea.

Tea Time by Jordan Fabrics.  The pattern is free and she makes it look soooooo easy!  Click HERE.

Not long ago my baby sister whined "Everyone has a quilt but me. (sad face here)"  Her birthday is in April (happy face here).


Next on the docket
(any clue what I've been watching to on YouTube while I sew?)


Tilda Friends.  I saw this quilt posted on FB just this morning.  I really like bright, white backgrounds; I really like scrappy; and I really like using up all my scraps with a free pattern.  Enter Duck Quilt. WIN, Win, win!!! 

If you like a country flavor, this is the site for you.  There are some adorable, free, patterns on this site and not everything is a quilt.


Someone is selling a quilt made from this pattern on Etsy
Very cute!  And, I like her choice of background fabric. 


 Just plain fun


I saw this wall hanging on the FB page Scrappy Girls Club
I do not think there is a pattern, but if you're in the mood to just sit down and sew, wouldn't this be fun?


Finally for the advanced in the group
Dancing Ribbons by Cindy Round Richards.

Get the free pattern HERE on the American Quilting Society (AQS) site and don't forget the coloring chart.

Read the How To at My Patchworld.

I love this but I don't think I'm up for the challenge....


The last Word 
Just to mention some sites for free patterns.  These are in no particular order and there are many more.

Bonnie Hunter especially if you like scrappy.  Also, she usually has an annual mystery, quilt-along.
For the person who likes modern quilts, Spruce Crafts.
I could spend some time on the Art Gallery Fabrics website...two thumbs up!
If you don't have anything better to do of an evening....start HERE....many, many sites for free patterns!! 

WARNING: looking for free patterns is like falling into a black hole, it goes on forever.  And it is addictive!

Sunday, January 10, 2021

The Spirits Join Forces

My Creative Spirit
My Oregon Repurpose, Reuse, Recycle Spirit
My Dave Ramsey Save-Money Spirit...have all come together.....

The Storm At Sea, birthday quilt for my son is all pieced and put together.  Next Step....removing the foundation piecing paper from the backside...ick....that'll take a while.  (I'll make a reveal post when it is quilted and bound.)

In the meantime, I need a short break but I still have the need to be creative.  I've been watching YouTube videos. 
Lori Holt of Bee in My Bonnet and Laura Coia of Sew Very Easy are two of my favorites.  Their videos are not just quilting related but all manner of fun stuff.

While watching Lori Holt, I came across this video:  Making a Design Board.

Friendship Star Sashing
from a Baby Quilt I made in 2016
Some quilt designs are a bit tricky i.e., Friendship Star sashing and complicated boarders as in the one I used for my nephew's Motorcycle quilt a couple years ago, etc.  What I need to do is lay out the pieces so I can see them. 
 

Jason's Motorcycle Quilt Border, 2018


The Dilemma: laying out the pieces on my work surface without knocking them around, getting them out of order or even dropping them on the floor. 
 

The Solution:  Lori Holt's Design Board!  (FYI:  These are sold in Bee in My Bonnet Etsy shop if you are so inclined. 
Even so, very nice of Lori Holt to share her secret with us, don't you think?
)


Step 1:  Grab left over batting from a tub of scraps kept on a high shelf.


I feel like the Romper Room Lady, looking
through her magic mirror;
I see strips from (many quilts in the past.)


Step 2:  Search through the strips bin to find something cute.
(These are not all the strips I have... I have four strip bins.)


Step 3: What to use as a base?  A yard sign I hung from my balcony announcing the Christmas Eve service at my church will work!

NOTE:  This sign is some kind of plastic.  While a hot glue gun was great for attaching the batting to the face of the board, it was no bueno for attaching the binding to the back (to flip forward). 
It would not stick.  I had to use Elmers glue and A LOT of clips...then wait, wait, wait for the glue to dry.


I was able to switch back to using the glue gun when I flipped the binding to the face of the board.  The batting is very porous, so that worked.


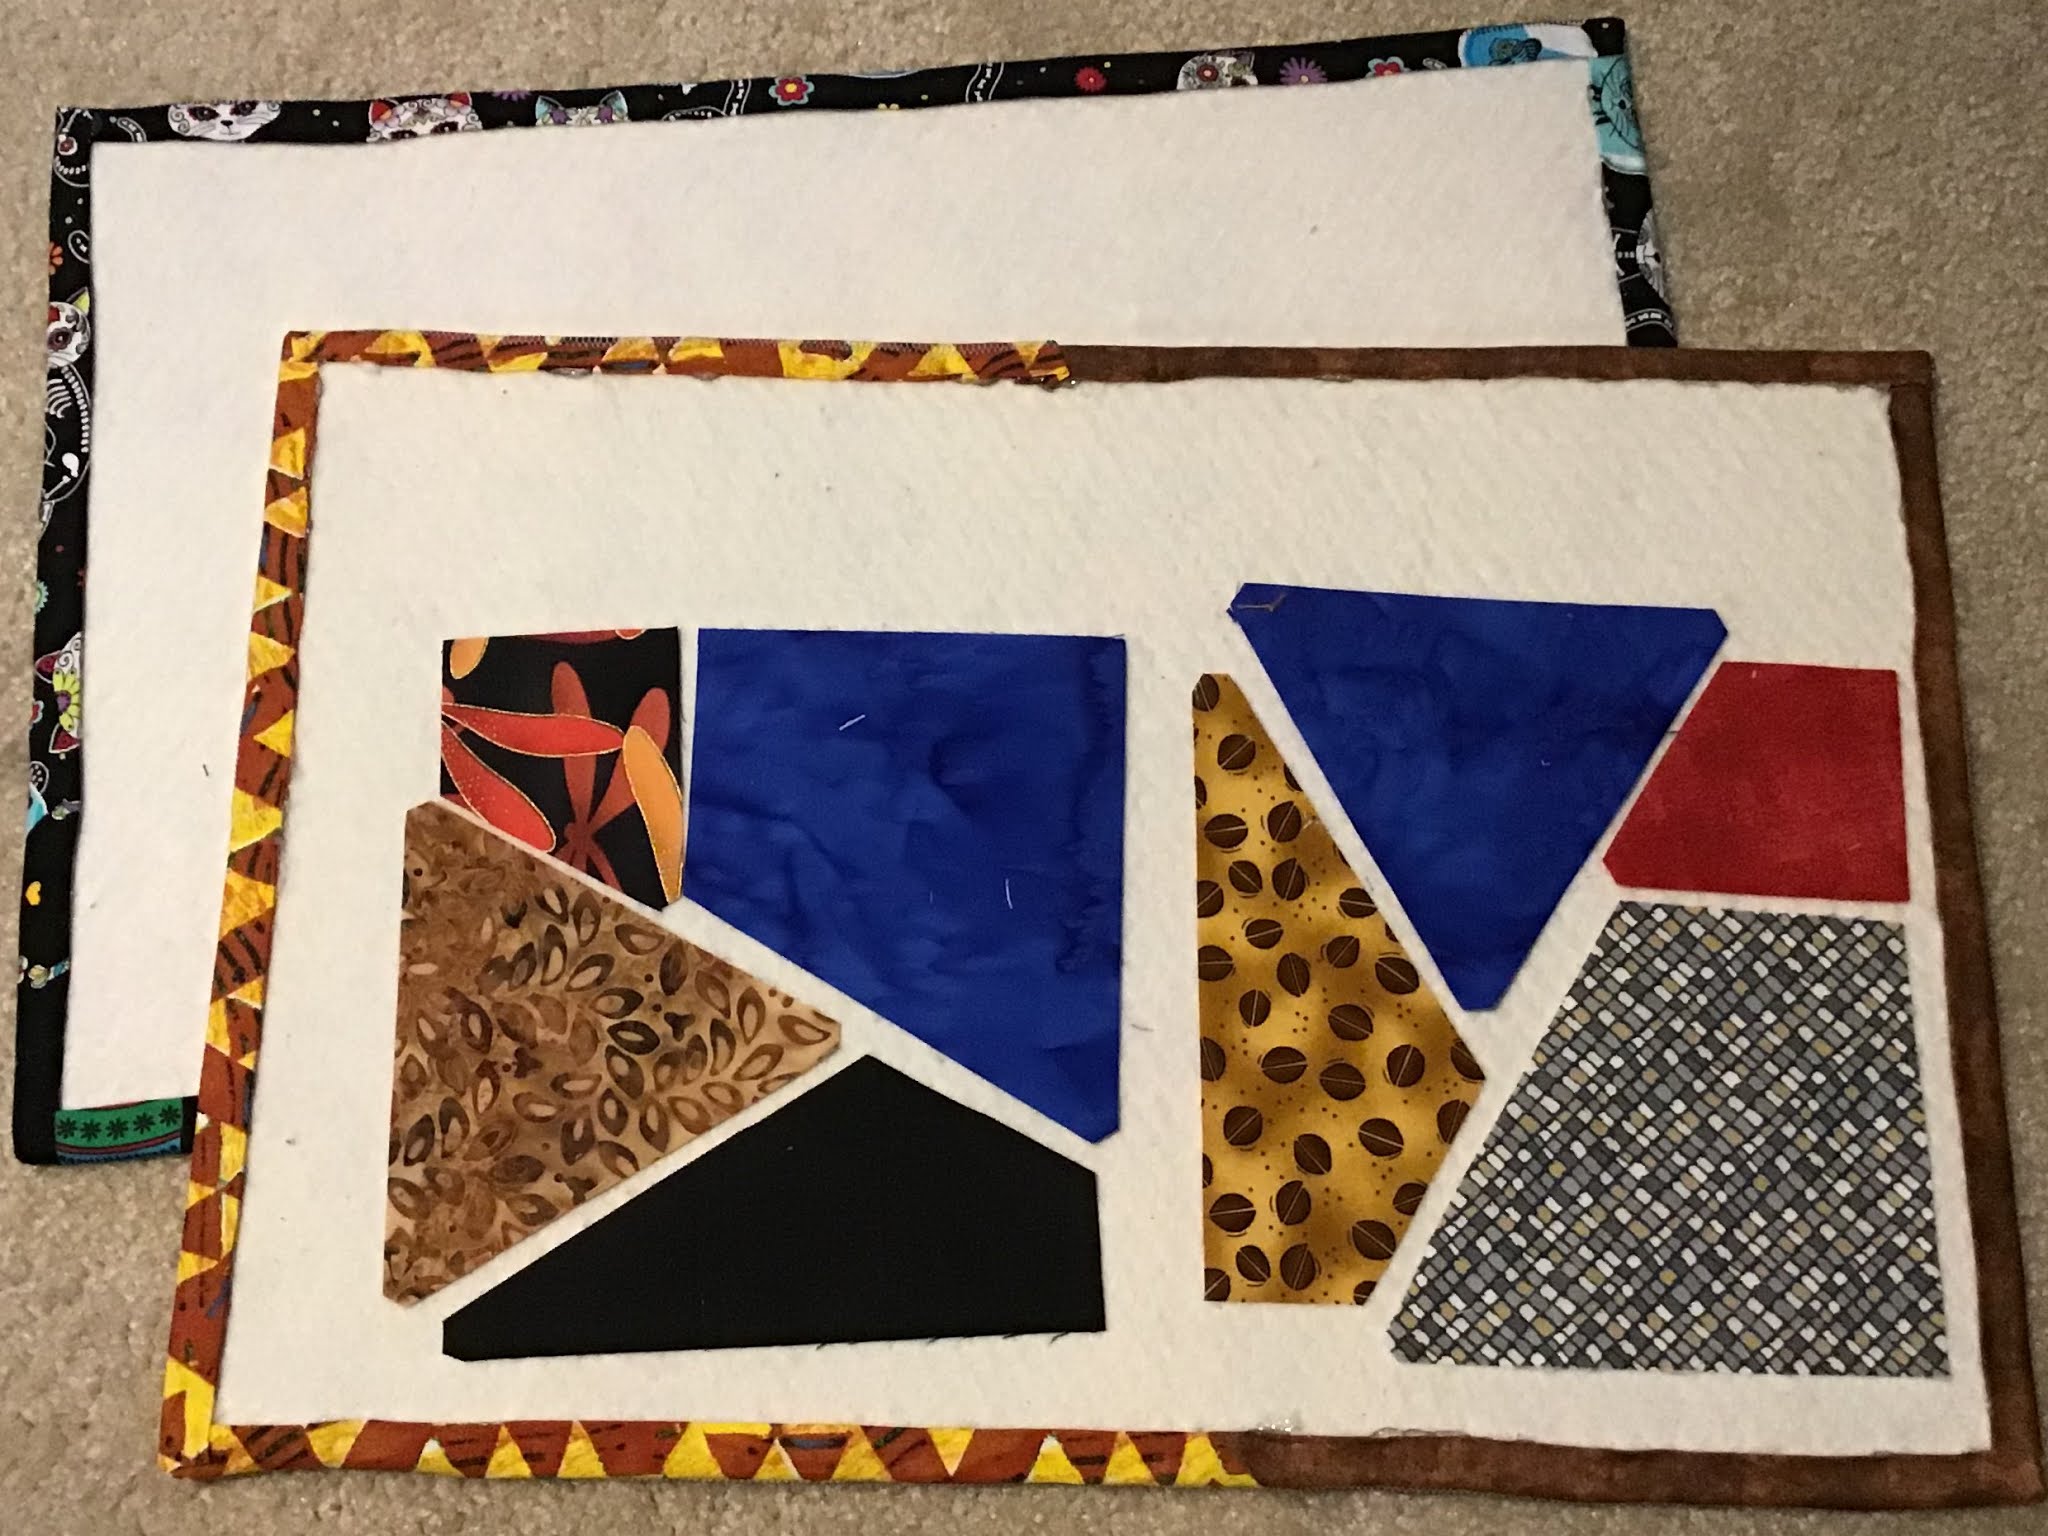
And, TA-DA!  While they're not perfect, I think they will do!  AND, no money was spent making this project. (And more importantly, no trips to the hobby store were made, since we are supposed to be safer-at-home.)


Two Rabbit Trails:

RT One.  Making the binding (this is not like a regular quilt binding as you may have noticed from Lori Holt's video).  I took this opportunity to try out a little gadget I purchased how many years ago????


Sashers by Pauline's Quilt World.  I purchased these at some quilt show and I cannot remember the year.  I'd like to say the process was so much easier than the long way, but I found them cumbersome.  The fabric kept twisting.

To be fair...I didn't stop and watch the how to video because this was a quick and dirty project and I frankly didn't want to spend that much time.  

But now that I've broken the seal on the package, I think I'll try to incorporate them into my binding-making and learn the proper way to use them.


RT Two-The pieces on my new Design Board: Some time back (again, I don't remember how many years back, but I was already living in my new state so not more than nine years) my friend, Miss Mary,  gave me these acrylic templates Scrap Crazy 6 by Karen Montgomery.  I started cutting scraps and arranging them in a storage box. The box was placed on the shelf and there it sat.  Looking for some pieces to act as models for my new Design Board
I spied with my little eye.....


Now that I've dusted off the top of the box, I think I'll use these as Leaders and Enders.  If you are not familiar with Leaders and Enders, check out Bonnie Hunter's website and blog, Quiltville.  I think she is the original Leaders and Enders lady. 
As an added bonus she has so many ideas and loads of free patterns, too!  

Using these pieces as Leaders and Enders will someday give me an Accidental Quilt!!

Picture plucked off Pinterest.  Cute idea!
I like the top stitching making it look like a Crazy Quilt.

UPDATE:  I do like these Design Boards.  But, I found an easier way.....

Use Elmers Spray Glue to stick the batting down and skip the cute borders.  I made two sizes.  Really useful!


Friday, January 1, 2021

Quilters, Get Ready

 ...for a new year of quilting. (People Get Ready by Rod Stewart....Relaxing video HERE.) 
The studio is clean, I've made my UFO list and I've made my resolutions, so now I'm ready.  What about you?

I came across this video that will work perfectly for one of my Jelly Roll UFOs and coincidentally it will work for a birthday, lap quilt I need to finish this year, also.  It is called New Year's Star by Jordan Fabrics and IT'S FREE!  

So, if one of your 2021 resolutions is to save money, here ya go...!!!


Donna Jordan does a very nice job with this tutorial.  Not only is it easy to follow, she gives some tips-and-tricks along the way.  This would be a great project for beginners.  Click HERE for the YouTube tutorial.

Speaking of tips-and-tricks; Laura Ann Coia of Sew Very Easy has a tip for making a Cone-Thread-Stand.  For those of us who don't have a long-arm machine or a serger, we don't usually buy thread in the cone-size.  However, I do have trouble with my thread spools bouncing off the thread pin, especially when sewing long seams such as when attaching quilt borders.

This looks like a GREAT solution and it looks fast and easy.  Click HERE.   I decided to give it a try.


Not owning an H.H. (handy hubby) I'll need to do this myself.  (If Laura can do it, so can I.)
 

First obstacle, I did not have the same type of pliers Laura used.  You need the type that has the cutter where the center pin is located.  Regular pliers can't hold the coat hanger securely enough to bend it.  I DID have a pair of hemostates!  

Bending the coat hanger only took a few bends.  


Next step....finding something cute or pretty as a holder.  I've been in the purging mode the whole year of 2020 so the pickins are slim.  This is where coffee cups come in handy.  You know the ones....way in the back of your cupboard.  The one I chose was purchased at the National Quilt Museum in Paducah, KY a number of years ago. (See the Courthouse Steps quilt design?)

And, VIOLA, here is the finished product!


To all my sister quilters, let's get sewing!